Want to save thousands of dollars? Building your own patio could do just that. Our last professionally installed patio cost us almost $3K, and it wasn’t even that big. A DIY paver patio costs just $8-$20 per square foot, while professional installation runs $15-$30 per square foot.
The benefits go way beyond the reach and influence of your wallet. Your DIY patio can last 30-50 years with minimal upkeep when you install it right. On top of that, it can boost your home’s value by 8-10%, making it one of the most affordable outdoor improvements you can take on.
You’ll need to understand the basics before you start. The foundation work requires digging 8-10 inches below your desired patio height and adding 4-6 inches of packed gravel base. These vital steps make sure your patio lasts.
This piece walks you through every step to build your own patio, from planning to final touches. We’ve packed it with practical advice you’ll actually use, whether you want to create an outdoor entertaining space or a peaceful retreat.
Plan Your Patio Project

Image Source: Fine Homebuilding
Planning is the crucial first step that leads to a successful DIY patio project. Your thoughtful assessment of needs will give your patio the perfect complement to your home and lifestyle.
Define the Purpose and Usage
You need to figure out exactly why you want a patio—this becomes the foundation for all your design decisions later. Here are some essential questions to ask yourself:
- How will I use the space? (entertaining, dining, relaxation)
- Who will use it most? (family, guests, pets)
- What furniture and amenities do I need?
- How many people should it accommodate?
These answers shape everything from size requirements to material choices. Entertaining spaces need enough room for seating and easy movement. A dining area with round or square tables for four people needs at least 10 by 10 feet. Rectangular tables that seat six require about 10 by 12½ feet.
Your long-term budget limits also matter. Available funds will substantially affect your patio’s size, materials, and features. Make sure to include both construction costs and future maintenance expenses in your budget.
Measure and Sketch Your Layout
Create a simple sketch of your planned patio before you start digging. This visual guide helps avoid mistakes that get pricey and makes sure your design flows with the landscape.
The right measuring tools make a difference: tape measure, stakes, twine, and marking paint. These help outline your proposed patio’s boundaries right on your yard. Seeing the actual space marked out helps you visualize the final result before construction begins.
Your patio’s shape matters just as much as its size. Three design styles come off the top of my head: symmetrical (arranged with your house), asymmetrical (slightly askew but still geometric), or curved (flowing with the natural landscape). Curved designs work especially well because they add visual interest even from inside your home.
Clear walkways deserve special attention. They prevent congestion and create easy access between your house and different patio areas. Look at sight lines from windows and doors to assess how your project will change the views.
Gather Tools and Materials
A well-stocked toolkit makes building a patio much smoother. Good planning and the right materials will give you the best shot at success.
Essential Tools for Diy Patio
The right tools will save time and give you better results. Safety comes first – you’ll need glasses, gloves, and ear protection. Here’s what you’ll need to dig and prepare the base:
- Flat shovel (works better than garden spades)
- Aluminum landscape rake or concrete placer
- Wheelbarrow (steel models handle heavier loads)
- Rubber mallet (16-28 oz)
- String line, line level, and measuring tape
- 2×4 or aluminum screed board
- Screed rails (2″ PVC pipe or aluminum tubing)
- Plate compactor (rental works best for larger projects)
A good tamper will keep your base solid and prevent future sinking and movement.
Choosing the Right Pavers and Base Materials
Your patio’s foundation plays a vital role in how long it lasts. The base needs three separate layers:
The subsoil (existing ground) forms the bottom layer. Next comes crushed stone or gravel base (¾-inch crushed stone works best). Walkways need this layer 6-10 inches thick, while driveways need 8-14 inches. Last comes a 1-inch bedding layer of coarse sand or small chip stone.
Paver options include concrete pavers ($6-10 per sq ft), stamped concrete ($11-13 per sq ft), brick ($8-10 per sq ft), or flagstone ($16-20 per sq ft). Your budget, climate, and style preferences should guide your choice.
How Much Material Do You Need?
Careful material calculations help avoid extra supply runs. Major home improvement stores offer online calculators to figure out paver quantities. Buy 10% more pavers than your estimate shows – this covers breakage, cuts, and future repairs.
The Interlocking Concrete Pavement Institute suggests these gravel base amounts:
- 4 inches thick: 2 tons per 100 sq ft
- 6 inches thick: 3 tons per 100 sq ft
- 8 inches thick: 4 tons per 100 sq ft
- 12 inches thick: 6 tons per 100 sq ft
Patio walkways should be at least 3 feet wide for easy movement. A 4-foot width lets two people walk side-by-side comfortably.
Prepare the Ground Properly
A well-prepared ground is the foundation of a patio that lasts generations. The preparation might take extra work, but it determines how stable and durable your patio will be for decades.
Mark and Excavate the Area
Start by marking your patio’s perimeter with white marking paint. The marked area should extend 6″ on all sides to fit edge restraints. Place garden stakes right outside these marks and run mason’s line between them to set height references.
The next step is to remove all vegetation including grass, weeds, and shrubs. These organic materials will decompose and cause uneven settling over time. A garden edger works best to cut through sod, and you can use a mattock or shovel to remove it.
The dig depth should be 7-9 inches for areas where people walk, while vehicle areas need 9-13 inches. You’ll need space for 4 inches of gravel base, 1 inch of sand, plus your paver thickness.
Ensure Proper Slope for Drainage
The right slope keeps water from pooling and damaging your foundation. You should aim for a 1-inch drop every 4-8 feet as you move away from your house.
Setting the grade requires wooden stakes at both the starting edge (usually near your house) and the end of your patio. Connect these stakes with string to match your desired slope. A 20-foot patio typically needs about a 5-inch total drop.
Call Before You Dig: Protecting What’s Underground
You must call 811 at least 3 days before any digging project. This free service helps mark underground utility lines with paint or flags. The US sees utility damage every 4 minutes, with repair costs reaching $30 billion each year. Utilities can lie just inches below the surface, so even shallow digging poses risks.
If you’re working in the Houston area, consider contacting Houston utility locating services before you start — professionals can pinpoint buried lines and protect your project from costly breaks or dangerous electric or gas hits. Once underground utilities are marked, proceed with hand digging within 18″ of any flagged line. This simple step prevents service disruptions, property damage, and keeps everyone safe.
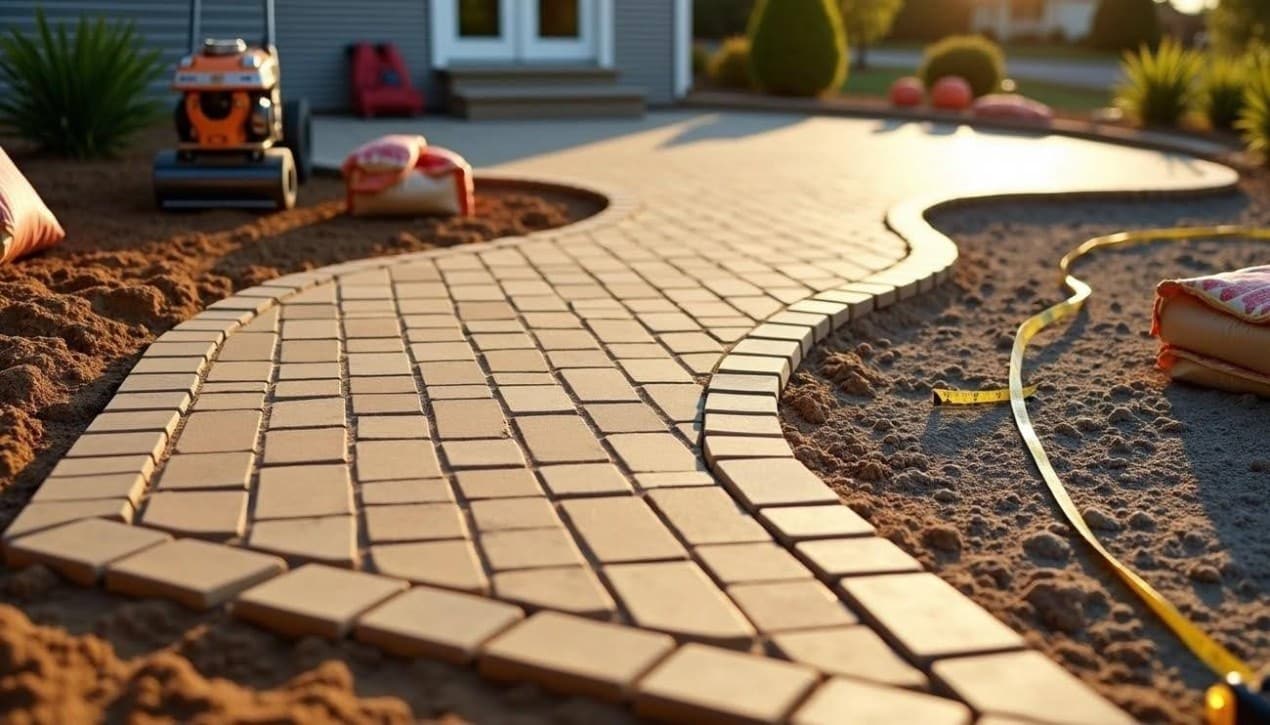
Build and Finish the Patio

Image Source: Mr. Mulch
Your empty space is ready to become a beautiful patio now that the ground is excavated and level. Building a long-lasting patio needs close attention to detail.
Add Gravel and Compact in Layers
Start by marking your area and use a landscape rake to spread paver base material to a 4-inch depth. The material should go in 2-inch “lifts” (layers) instead of all at once. Each layer needs proper compacting before adding the next one to create a solid foundation. A light water mist will improve the stability. A plate compactor rental will save time and energy for bigger areas.
Screed Sand and Lay Pavers
Set metal conduit pipes or tubing on your compacted base as screeding rails. Pour a 1-inch layer of concrete sand between these rails. A 2×4 board dragged across them will create a level sand surface. Remove the rails and fill any gaps. Begin at a corner and place pavers one by one in your pattern. Set them straight down without dragging. The pavers should fit tightly together.
Install Edge Restraints and Fill Joints
Edge restraints keep pavers from spreading outward as time passes. Set plastic edging right against outer pavers and secure it with 10-inch spikes every foot. Spread a thin layer of paver sand over the entire surface once all pavers are set. Sweep the sand into the joints. Run a plate compactor over the patio, add more sand and repeat.
Mist and Cure the Patio Surface
The patio’s durability depends on proper curing – concrete reaches full strength after 28 days. You can walk on the surface after 24-48 hours. Keep proper moisture and temperature (50-85°F works best) during the first week. The surface needs misting to prevent early drying.
Avoiding Common Diy Mistakes
DIYers often skip vital steps. Without doubt, poor base preparation is the most common mistake that leads to uneven surfaces and sinking. The right materials for your climate matter just as much. Using regular sand instead of polymeric sand can let weeds grow between pavers.
Conclusion
Building your own patio is one of the most budget-friendly home projects you can take on. This piece walks you through all the vital steps—from original planning and picking materials to getting the ground ready and putting it all together.
A solid plan is the foundation of a great patio. The time you spend thinking about its purpose, size, and layout will benefit you for years. Getting your tools and materials ready before you start prevents any holdups during the build.
The ground preparation phase needs your full attention. Time spent on digging, creating the right slope, and packing the base directly impacts how long your patio lasts. A properly built patio can serve you for 30-50 years with little upkeep, which makes those extra hours of foundation work worth every minute.
Installing edge restraints, filling joints, and letting everything cure properly helps your patio stay strong through changing seasons. The difference between a patio lasting five years or fifty often comes down to these small but crucial details.
You have everything you need to build a beautiful outdoor space and save thousands of dollars. Maybe you want to host summer barbecues or just enjoy quiet coffee mornings outside. Your DIY patio will improve your lifestyle and property value for years. Take it step by step, and soon you’ll feel proud of what you’ve created with your own hands.