Removing a deck yourself saves money and gives you control over the structure and materials. With simple tools like a screwdriver, crowbar, and hammer, you can carefully take apart boards, joists, and posts. Doing it yourself helps you spot problems like rot, wobbly or loose boards, and rusty hardware early. Here is the guide about DIY Deck Removal with safety and effectly.
Assessing Your Deck: Is It Time for Removal?
If your deck feels shaky or wobbly, it’s a red flag that the structure needs close assessment. Using a screwdriver or probe, check for signs like:
- Soft, spongy, or crumbling wood caused by rot, decay, or insect damage (e.g., termites)
- Warped, curling, or loose boards and splintering planks
- Discolored, cracked, or compromised posts, joists, or beams
- Popping joints or raised railings that wobble or lean
- Hollow-sounding boards underfoot
- Rusty or failing hardware like nails, screws, or metal connectors
- Foundation issues such as leaning, sinking, or shifting soil due to erosion or frost heave
Small repairs might fix minor problems, but when these signs show, a full teardown is often the safest solution to protect both safety and aesthetics.
Tools and Safety Gear You’ll Need for DIY Deck Demolition
Safety Gear:
- Safety glasses or goggles: Protect your eyes from flying nails, dust, and wood splinters.
- Dust mask or respirator: Prevents inhaling harmful dust, mold, or lead paint particles from old decks.
- Heavy-duty work gloves: Shields your hands from cuts, splinters, and rough wood.
- Steel-toed or sturdy work boots: Protect feet from falling debris and sharp objects.
- Ear plugs or ear muffs: Protect your hearing when using loud power tools.
- Hard hat: Guards against falling debris during demolition.
- Long sleeve shirt and durable pants: Made from breathable fabric to protect skin from scratches and splinters.
Tools:
- Crowbar, pry bar, wrecking bar: Used for prying boards, pulling nails, and leveraging materials apart.
- Claw hammer with curved back: Ideal for extracting nails and minor demolition tasks.
- Impact driver or cordless drill: Speeds up removing screws and loosening fasteners.
- Reciprocating saw (Sawzall) and circular saw: Cut large deck boards, metal brackets, and stubborn nails quickly.
- Sledgehammer or jackhammer: Breaks concrete footings and tough deck parts.
- Wheelbarrow or yard cart: Makes hauling debris easier and safer.
- Rope or straps: Secure and bundle boards for easy transport.
- Shovel and digging bar: Clear dirt and dig around posts for footings.
- Ladder: Provides safe access to elevated deck areas.
Pro Tip: Organize your tools near the deck. Also, inspect each tool for damage and replace any worn-out blades or bits to ensure smooth operation and safety.
Step-by-Step Process to Remove a Deck Safely and Efficiently
Start with Railings and Stairs
Start by unscrewing and prying railings, posts, and stairs carefully using a screwdriver, hammer, or crowbar. This clears access, prevents tripping hazards, and protects property. Work systematically, stack wood to reuse or recycle, and always wear safety gear.
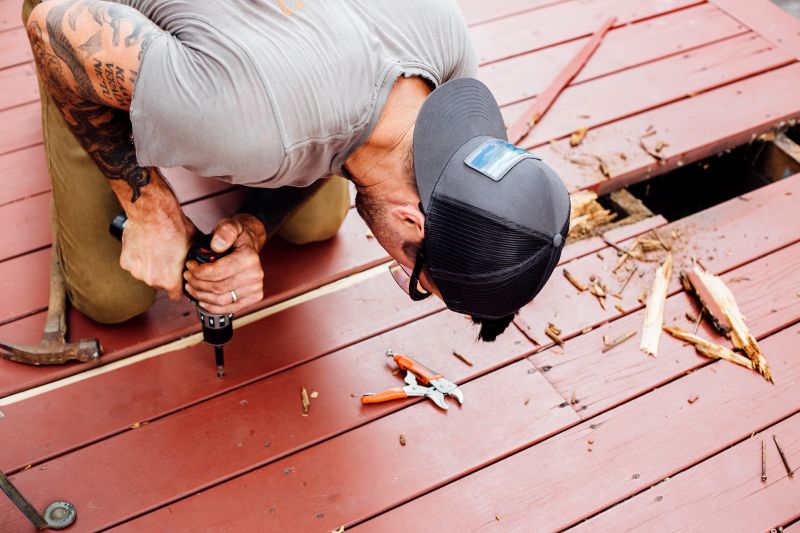
Pull Up Decking Boards
Once railings and stairs are removed, carefully unscrew or pry the decking boards from the joists using a screwdriver or crowbar. Work systematically to avoid damaging the frame, then stack boards neatly for reuse or recycling.
Dismantle Joists and Beams
After removing railings and stairs, carefully unscrew or pry the joists and beams from the frame using a screwdriver, wrench, or crowbar. Work systematically to avoid damaging the structure or nearby siding and landscaping, then stack wood neatly for reuse or recycling. Having a helper makes lifting large pieces easier and safer.
Remove Concrete Footings (If Applicable)
When removing concrete footings, start by clearing the area of obstacles and protecting nearby utilities like electrical wires or gas lines. Use a shovel and sledgehammer or rent a jackhammer to break and dig around the base carefully. Work with a helper to safely lift and remove pieces.
Managing the Mess: How to Handle Deck Demolition Waste
During deck removal, sort and separate wood, metal, fasteners, and concrete. Use dumpsters or containers for safe disposal or recycling. Wear gloves and eye protection to avoid injuries and keep the area clean and safe. Here’s how to handle the mess efficiently after your deck demolition.
Wood
- Sort into untreated wood, pressure-treated wood, and painted wood
- Untreated wood can be reused or composted
- Treated wood and paint chips need special disposal due to chemicals
- Keep wood pieces clean and in manageable chunks
Metal
- Collect nails, screws, brackets, and bolts in a container
- Take to scrap yards or metal recycling centers
- Separate all metal hardware from debris for proper recycling
Concrete and Footings
- Remove large concrete chunks and footings carefully
- These should be crushed or taken to construction waste facilities
- Follow local regulations for disposal
Other Materials
- Separate plastic components and composite materials
- Handle old paint chips with special handling
- Dispose of non-wood materials following local recycling centers rules
Rent a Dumpster
Renting a roll-off dumpster is the easiest way to handle waste from large deck removals. Different sizes are available to dispose of mixed debris, including treated wood and concrete. Always check with the local rental company like bin rental Oakville about restrictions and which materials are allowed to ensure you safely and legally remove your debris. From my experience, choosing the right dumpster and following companies’ rules makes cleanup faster and stress-free.
Conclusion:
DIY deck removal gives you control to safely dismantle your decking boards, joists, and posts using tools like a crowbar and impact driver. Wearing safety gear such as gloves, eye protection, and a dust mask helps prevent injuries. Properly sorting and disposing of treated wood, metal hardware, and concrete chunks ensures legal and eco-friendly cleanup.