Why Replace Residential Windows?
Homeowners often consider window replacement to eliminate drafts, boost curb appeal, and save on energy bills. Old or faulty windows can allow conditioned air to escape, increasing utility costs and making the indoor environment uncomfortable. According to the U.S. Department of Energy, up to 30% of a home’s heating and cooling energy can be lost through inefficient windows. Installing modern replacement windows addresses these issues, often resulting in noticeable energy performance and home comfort improvements. Modern windows feature low-emissivity (Low-E) coatings and gas-filled panes that significantly reduce heat transfer. These innovations improve insulation and protect interiors from UV damage, helping floors and furnishings retain their color and integrity over time.
Choosing the Right Windows
Selecting new windows involves more than just picking a style or color. Energy efficiency, durability, and materials matter just as much as appearance. Double or triple-pane glass, low-emissivity (Low-E) coatings, and insulated frames all contribute to overall performance. In recent years, new trends highlighted by resources show increasing interest in smart glass, eco-friendly materials, and designs that can even improve natural lighting inside the home. Consider not only esthetics but also long-term maintenance costs and compatibility with your region’s climate.
The Step-by-Step Window Replacement Process
1. Assessment and Measurements
The window replacement process begins with a thorough assessment. Professionals visit your home to inspect existing frames and evaluate for potential water damage, rot, or structural concerns. Precise measurements ensure a custom fit for every opening. Detailed estimates and product choices are typically discussed at this stage, so there are no surprises later.
2. Window Selection and Ordering
Once measurements are taken, homeowners choose their preferred style, material, glazing, and hardware. Options range from traditional double-hung windows to contemporary picture windows, each offering unique ventilation, security, and energy performance benefits. Companies like Universal Windows Direct of New Jersey provide various customization options to suit personal preferences and architectural styles. After selections are made, custom windows are ordered and prepared for installation.
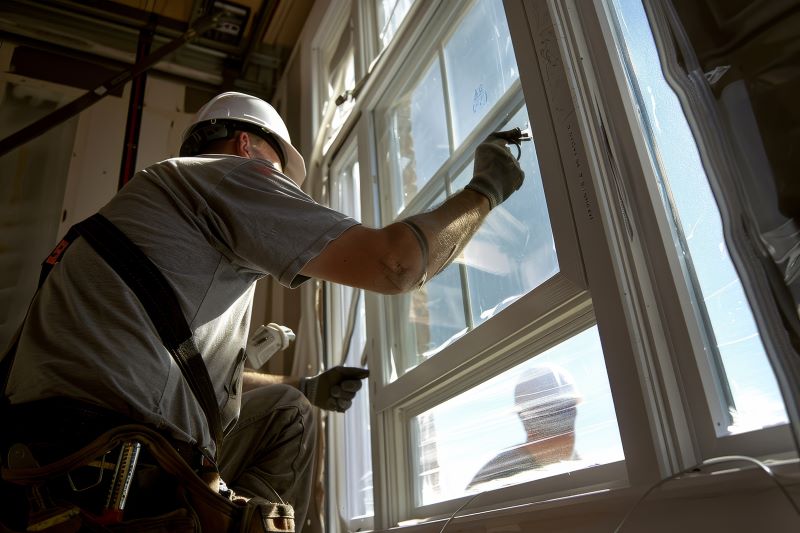
3. Removal of Old Windows
On installation day, the old window units are carefully removed. Technicians work to avoid damaging the surrounding trim, walls, or siding. Once the old windows are out, openings are inspected and prepped, including any necessary repairs, cleaning, and insulating for a tight seal.
4. Installing the New Windows
New windows are set in place, and the level and square fit are checked. The installers secure each unit using approved fasteners and insulate the gap between the window frame and the wall. The perimeter is sealed with high-quality caulk or foam to prevent drafts, leaks, and future water intrusion.
5. Finishing Touches and Inspection
The final steps include installing exterior and interior trims, making necessary paint or touch-up repairs, and performing a detailed inspection. Professional installers will ensure every window opens, shuts, and locks smoothly before calling the job complete.
Benefits of Professional Installation
Precision installation is critical for energy savings and to prevent issues like sticking condensation or air infiltration. Reliable professionals adhere to manufacturer and building code standards and guarantee a clean, hassle-free site. By following the right process, homeowners benefit from windows that deliver on performance, appearance, and longevity. The research outlined by U.S. energy experts confirms the return on investment for efficient windows can be seen both in monthly utility costs and long-term property value.